Ad Blocker
If you block ads, web pages will load faster and look cleaner. By blocking ads with Opera’s built-in Ad Blocker, you also block the source of many tracking cookies. Ad Blocker also stops cryptocurrency mining scripts.
To block ads:
- Go to Settings.
- Under Block ads, turn on Block ads and surf the web up to three times faster.
You can also turn on Ad Blocker by going to the Easy Setup menu found on the right side of the toolbar.
Click Manage Exceptions to set site-specific preferences. By default, a few sites are not blocked.
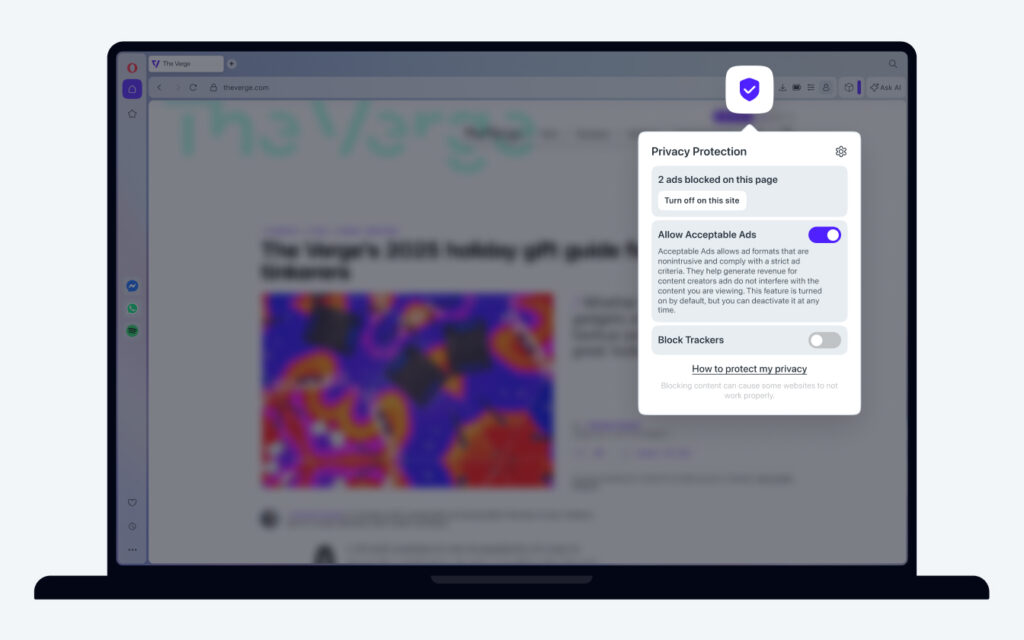
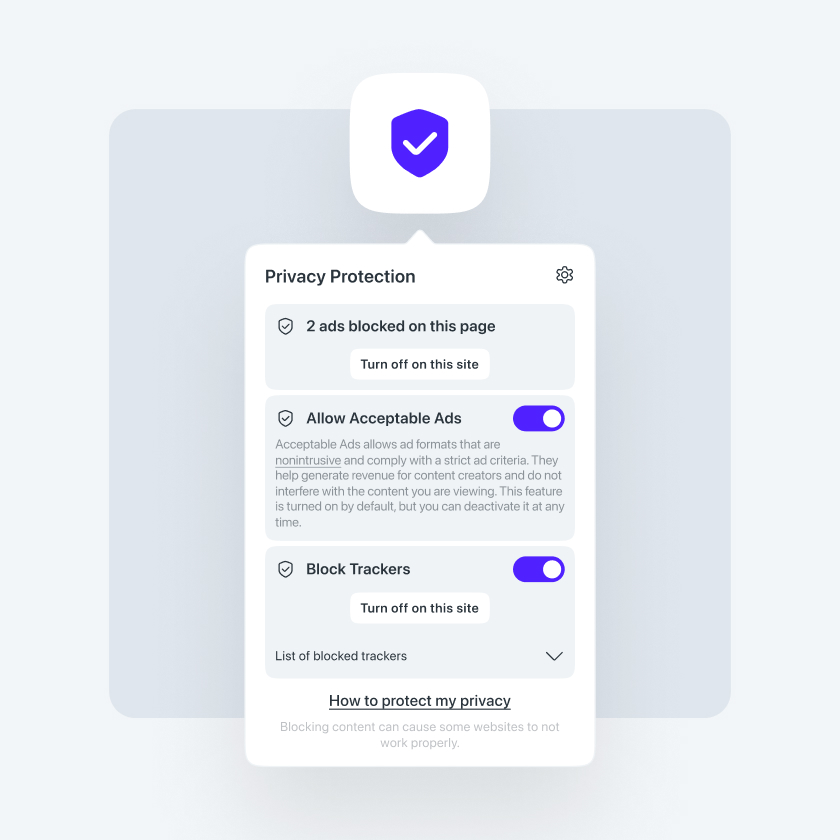
On the right side of the combined address and search bar you can see a small badge ![]() . Click on the badge for more information, including the number of blocked ads and trackers, and a site-specific switch for unblocking ads or trackers.
. Click on the badge for more information, including the number of blocked ads and trackers, and a site-specific switch for unblocking ads or trackers.
To stop cryptocurrency mining, or cryptojacking, from happening on your computer:
- Go to Settings.
- Under Block ads, click Manage Lists.
- Click the NoCoin (Cryptocurrency Mining Protection) checkbox.
Read more about cryptocurrency mining and how we stop this practice here.
Tracker blocker
Opera’s tracker blocker feature blocks online tracking from analytic scripts, tracking pixels, and other methods of data collection. Removing trackers protects your privacy and data, as well as helps pages load faster. To block trackers:
- Go to Settings > Basic > Privacy protection.
- Enable Block trackers.
Click Manage Exceptions to change site-specific preferences, or click Manage lists to change or add lists.
You can also turn on the tracker blocker by going to the Easy Setup menu found to the right of the address bar.
On the right side of the combined address and search bar you can see a small badge ![]() . Click on the badge for more information, including the number of blocked trackers and ads, and a site-specific switch for unblocking ads or trackers.
. Click on the badge for more information, including the number of blocked trackers and ads, and a site-specific switch for unblocking ads or trackers.
VPN
Normally, your browser connects directly to websites, allowing websites to identify your IP address and approximate location. With VPN, you connect to websites via a VPN (virtual private network) server. As a result, your apparent location changes to the location of the server.
Before using the free and no-log VPN service in Opera, you need to enable it:
- In Opera, go to Settings.
- In the sidebar, click Advanced, then click Privacy & security.
- Under VPN, click Enable VPN.
You will now see the VPN button on the left side of the combined address and search bar.
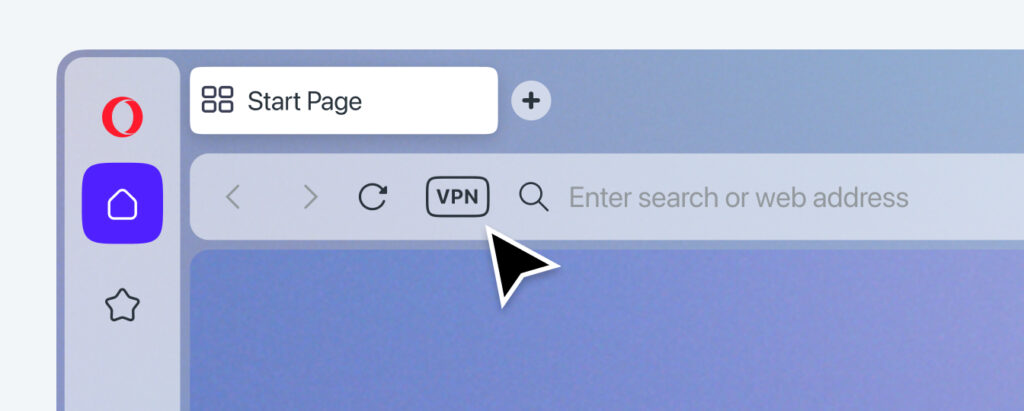
Click this button to open the VPN pop-up window. Here you can turn on VPN.

How to set up VPN
Once you’ve turned on VPN, Opera will find the optimal virtual location for you, changing your IP address. Or, you can choose from one of the following VPN server locations on the drop-down menu:
- Europe
- Asia
- the Americas
Learn how VPN and other Opera features protect your privacy and security.
Bypass VPN for default search engines
Using Opera’s VPN changes your virtual location while browsing. This influences your search results when using a search engine, such as Google. For example, if you intend to search for a nearby cafe while in Paris with VPN turned on, you may get attractive but inconvenient cafe recommendations in a faraway country.
Bypass VPN for default search engines allows you to use default search engines to find web inquiries relevant to your actual location with protection in an https:// connection. The VPN service will resume when you navigate to a web page.
If you wish to turn this off:
- Go to Settings.
- In the left sidebar, click Advanced, then click Privacy & security.
- Under VPN, turn off Bypass VPN for default search engines.
This is not supported in Private Mode.
How do VPNs work?
When you use the internet and you don’t use VPN, you connect to your ISP (internet service provider) which connects to the internet. Websites you visit see your real IP address and location, and the data sent back and forth can be seen.
When you use a VPN service like Opera’s built-in VPN, your client (your VPN software) encrypts your data and sends it through your ISP to a VPN server and finally to the page you’re viewing. This extra step disguises your location. Websites you visit do not see your IP address and location, but that of the VPN server your data goes through. Also, since your VPN client encrypts the data between you and the websites you visit, anyone looking can only see the encrypted data.
VPN is a free service, and the amount of data you are allowed to transfer is unlimited. Read more about how VPN protects your security.
Read more about VPN on the Opera blog.
Paste Protection
Paste Protection is a new feature that makes browsing safer. One potential security risk while browsing is the hijacking of your clipboard to replace a bank account number with a different one.
Paste Protection protects you from this. When you copy sensitive data in Opera Browser, the data is monitored for changes for some time or until you paste the data. If the data is changed by an external application, a warning is displayed.
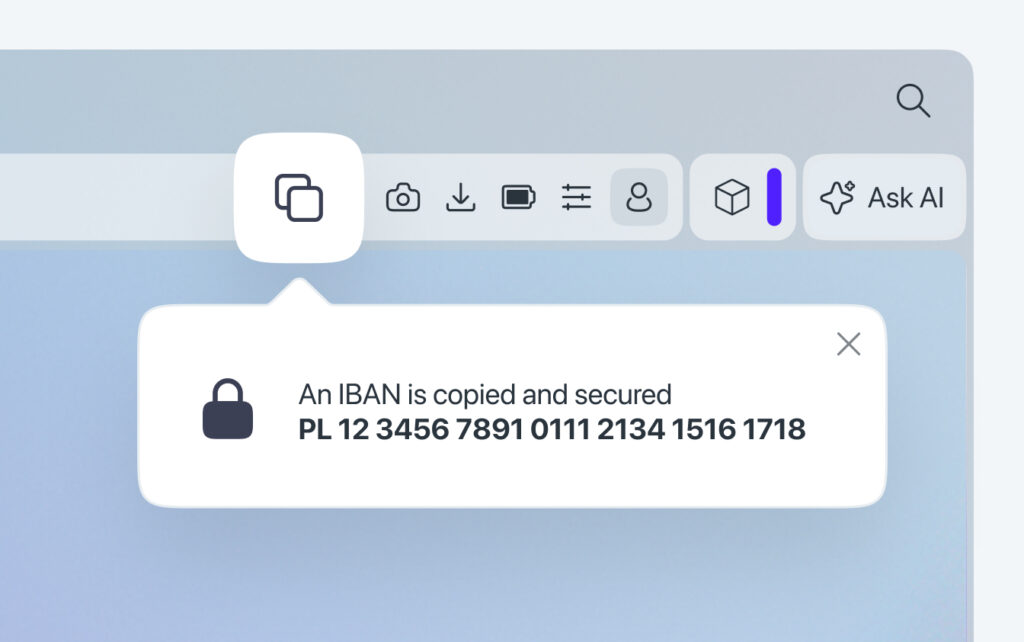
How does Paste Protection work?
When you copy an IBAN or credit card number, the Paste Protection icon appears to the right of your address bar along with a notification. For two minutes, or until you paste the data, your clipboard is monitored to ensure the number isn’t changed.
If an external application uses the clipboard during that time, the Paste Protection icon displays a warning. You also receive a notification when the data is pasted.
Currency converter
Whenever you select a text corresponding to a monetary value, such as $30, 10.50 zł, ¥800, or 2.00 BTC, the search pop-up will convert it to your desired currency.
For the currency converter to work properly, the corresponding currency symbol must be highlighted along with the numerical value.
You can copy the converted value to your clipboard by hovering your pointer over the value and clicking the revealed Copy button.
The currency converter uses your location at the time you installed Opera to determine your currency, but you can disable this function or change your currency on the settings page.
To change your default currency, which all highlighted currencies will convert to:
- Go to Settings.
- Click Advanced on the left sidebar, and click Features.
- Under Search pop-up, select a currency from the dropdown menu.
To disable the currency converter from the search pop-up tool, turn off On text selection, convert currency to.
Here is the list of currencies which Opera can convert:
- AUD, $ – Australian Dollar
- BGN, лв – Bulgarian Lev
- BRL, R$ – Brazilian Real
- BYN – Belarusian Ruble
- CAD, $ – Canadian Dollar
- CHF – Swiss Franc
- CNY, ¥ – Chinese Yuan
- CZK, Kč – Czech Koruna
- DKK, kr – Danish Krone
- EGP, E£ – Egyptian Pound
- EUR, € – Euro
- GBP, £ – British Pound
- GEL, ლ, ₾ – Georgian Lari
- HKD, $ – Hong Kong Dollar
- HRK, kn – Croatian Kuna
- HUF – Hungarian Forint
- IDR, Rp – Indonesian Rupiah
- ILS, ₪ – Israeli New Shekel
- INR – Indian Rupee
- JPY, ¥ – Japanese Yen
- KZT, ₸ – Kazakhstani Tenge
- KRW, ₩ – South Korean Won
- MXN, $ – Mexican Peso
- MYR, RM – Malaysian Ringgit
- NOK, kr – Norwegian Krone
- NZD, $ – New Zealand Dollar
- PHP, ₱ – Philippine Peso
- PLN, zł – Polish Zloty
- RON, lei – Romanian Leu
- RUB, ₽ – Russian Ruble
- SEK, kr – Swedish Krona
- SGD, $ – Singapore Dollar
- THB, ฿ – Thai Baht
- TRY – Turkish Lira
- USD, $ – United States Dollar
- UAH, ₴ – Ukrainian Hryvnia
- ZAR, R – South African Rand
Please note that currencies which share the $, kr, ¥, and the £ symbols will, by default, convert to the U.S. Dollar, Norwegian Krone, Japanese Yen, and the British Pound, respectively, if no other currency abbreviation is highlighted.
The currency converter can convert these four cryptocurrencies:
- BTC – Bitcoin
- BTH – Bitcoin Cash
- ETH – Ethereum
- LTC – Litecoin
Currency conversion is based on two reference rates reported either by the European Central Bank (ECB) using EURO as its base currency or the National Bank of Ukraine (NBU) using the Hryvnia as its base currency.
The default currency converter option is set to the ECB. According to the ECB, its reference rates are updated on working days, excluding TARGET closing days (generally Saturdays, Sundays and certain holidays). The ECB’s reference rates are based on a regular daily concertation procedure between central banks across Europe. Learn more about the ECB’s policy and exchange rates.
Reference rates using the NBU are updated in two groups, daily or monthly, according to the exchange rates of the Ukrainian Hryvnia against foreign currencies. Read more about NBU exchange rates.
Rates are not verified by Opera and you should confirm current rates with your financial institution before engaging in any transaction.
Unit converter
In the same way as converting currencies, the search pop-up can convert between imperial and metric units of measurement, such as feet ⇄ meters, gallons ⇄ liters, pounds ⇄ grams, and so on. Celsius and Fahrenheit are also included. Whenever a unit of value in either imperial or metric form is highlighted, the corresponding converted value will appear in the search pop-up.
For the unit converter to work properly, the corresponding unit symbol must be highlighted with the number.
You can copy the converted value to your clipboard by hovering your pointer over the value and clicking the revealed Copy button.
Here is the list of units which Opera can convert:
- lb ⇄ kg
- °F ⇄ °C
- oz ⇄ g
- mph ⇄ km/h
- mpg ⇄ l/100km
- gal ⇄ l
- qt ⇄ l
- fl ⇄ ml
- mi ⇄ km
- yd ⇄ m
- ft ⇄ m
- in ⇄ cm
- in ⇄ mm
- kW ⇄ hp
- lb ft ⇄ Nm
Time zone converter
When you come across an unfamiliar time, such as 18:30 KST, the search pop-up can adjust the time to your local time zone.
For the time zone converter to work properly, the time zone abbreviation must be highlighted with the hour and minutes included (see the formats below). You may also highlight an accompanying date, such as 17-10-2017, in addition to the hour and time zone abbreviation, and the converter will adjust the date if necessary.
You can copy the converted value to your clipboard by hovering your pointer over the value and clicking the revealed Copy button.
The time zone converter uses your system’s location at the time you installed Opera to determine your local time zone.
Here is the list of time zones which Opera can convert:
- PST / PDT: Pacific Standard / Daylight Time
- MST / MDT: Mountain Standard / Daylight Time
- CST / CDT: Central Standard / Daylight Time
- EST / EDT: Eastern Standard / Daylight Time
- AST / ADT: Atlantic Standard Time / Daylight Time
- NST / NDT: Newfoundland Standard Time / Daylight Time
- GMT: Greenwich Mean Time
- BST: British Summer Time
- MET: Middle Europe Time
- CET / CEST: Central Europe Time / Daylight (Summer) Time
- EET / EEST: Eastern Europe Time / Daylight (Summer) Time
- WET / WEST: Western Europe Time / Daylight (Summer) Time
- JST: Japan Standard Time
- KST: Korean Standard Time
- IST: Indian Standard Time
- MSK: Moscow Standard Time
Search highlight
The search pop-up tool is Opera’s utility belt that allows you to search or copy (or share if you’re on a Mac) the text you highlight on a web page. With just one click, your highlighted text opens a new tab and is queried by your default search engine. You can also copy the text to your clipboard to use later on.
Battery saver
Battery saver makes it possible to browse longer when your laptop is unplugged, as demonstrated in the following time-lapse performance test.
The first time your laptop’s power cable is unplugged, the battery saver icon appears next to the search and address field, along with the tip: Save battery and browse longer! If you accept the offer, battery saver will activate every time your laptop is unplugged. If you have not previously enabled ad blocker, you are encouraged to do so; battery saver works better when you also block ads.
If you click on the battery saver icon, a dialog appears with an on/off switch, a link to the battery saver options in Settings, and an estimate of the time remaining.
You can later enable/disable battery saver, select when the feature will activate, and decide to always show the battery saver icon by going to Settings > Advanced > Features > Battery saver.
So, how does battery saver work? The secret is that the browser avoids doing more work than it has to, reducing activity in background tabs, pausing plug-ins and animations, rescheduling JavaScript timers, and tuning video-playback parameters. If you’re playing online video games, you might want to switch it off.
Read more about Opera’s battery saver feature.
Video Popout
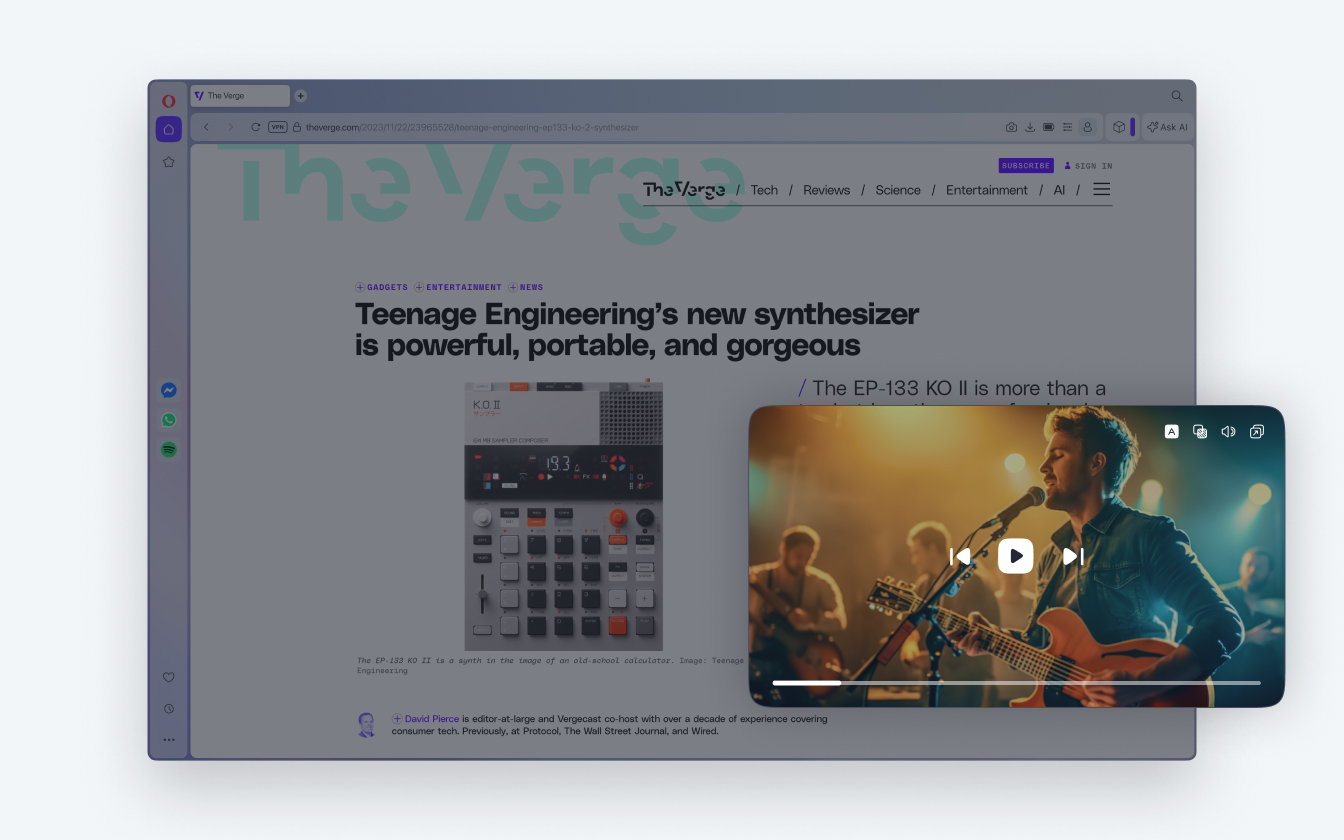
Opera’s Video Popout feature allows you to watch videos from YouTube, Twitch, Vimeo—almost any video provider—while browsing in other tabs or even using different applications.
Video Popout works seamlessly for video conferencing as well. When you visit another tab, the video call window (for example, Google Meet or the browser version of Zoom) remains open at the top of your screen, so you can always see who you’re talking to.
How to use Video Popout in Opera
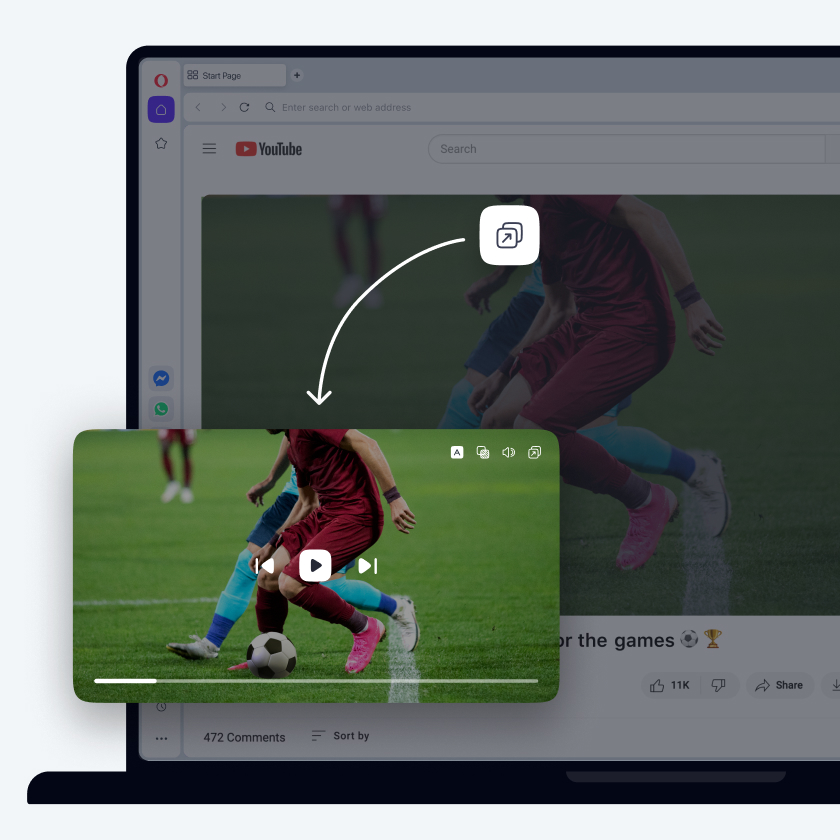
When using Video Popout, your video will play in an adjustable, movable, floating window. You can drag the window to any part of your computer screen—or even to a second screen—as well as resize the video as you please. The window will float above other windows and applications, ensuring you can always keep an eye on the action.
To detach a video from a webpage, just click the Video Popout button that appears in the top center of the video.
Adjusting volume, pausing/playing, and advancing to the next video can all be done in the popout window. Player controls are conveniently located at the bottom of the window, allowing you to manage video playback without needing to have the host tab open.
If you wish to quickly return to the tab playing the video, hover your mouse over the square icon with an arrow in the left upper corner and click Back to tab.
Closing the Video Popout window does not stop video playback; the video continues playing in its host tab. You can also close the Video Popout by clicking the popout button again at the top of the video.
To enable or disable the Video Popout and Videoconferencing Popout feature, go to:
Settings (Alt+P) > Features > Video pop out or Videoconferencing pop out
To make the feature automatically active, toggle on Automatically pop out videos when possible.
You also have the option to adjust the window’s transparency. You can enable that option in settings if you wish: Make popout transparent.
Video Skip
Opera’s Video Skip feature gives you more control over how you watch videos online. Instead of sitting through unwanted or irrelevant playback, you can jump straight to the end of a video with a single click. Whether it’s an ad, or content you’d rather avoid, Video Skip saves you time and keeps your watching uninterrupted.
How Video Skip works
When you hover over a video player on supported sites, you’ll see the Lucid Mode, Video Popout, and Video Skip buttons. The Video Skip button is marked with an icon showing two arrows. Clicking it instantly moves the video, or the ad, to its end. Depending on the site, playback will either pause on the finished video or automatically continue with the next one.
Some websites ask you to disable your ad blocker. With Video Skip, you can bypass those interruptions and skip straight to the end without turning off your ad blocker.
You can enable or disable the feature in Settings:
Settings → Advanced → Features and toggle Show Video Skip button on all supported videos.
Music Player
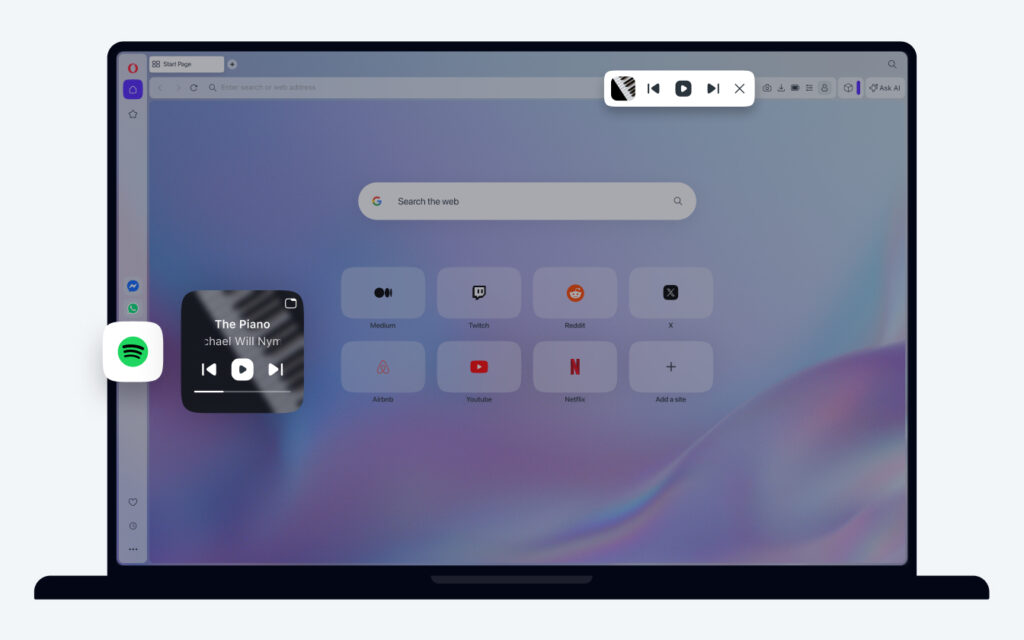
Music Player is an integrated feature in the Opera browser, which lets you listen to your favorite music from services like Apple Music, Spotify, YouTube Music, Deezer, and more in one place.
Music Player is available in the Opera browser’s sidebar. If you don’t see Music Player in the sidebar, click the three dots at the bottom of the sidebar, and select Player under Special Features. Log into your existing accounts to enjoy your music, use your created playlists, and browse the web simultaneously.
Music Player can be turned into a movable module, which you can move anywhere on your screen, even beyond the browser. This flexibility lets you position Music Player wherever you like, making it easy to control your music while you browse.
To turn your Music Player into a detached small module, you have to mouse over the Music Player icon on your sidebar. Then the modular window will show up, and you can drag it with your mouse.
You can also attach the Music Player module to your toolbar by clicking the Pin to toolbar button. This button is available at the top of the Music Player module, as well as at the top of Music Player’s sidebar panel.
To use your favorite music services in Opera, left-click the Music Player icon in the sidebar, then select the service you want to log into. If you want to switch services, click the drop-down menu in the top left corner and choose another service.
For advanced Music Player settings, open Music Player and click Settings at the bottom of the drop-down menu. You can also reach advanced settings through the browser settings menu:
Settings (Alt+P) > Features > Player > Enable Player.
There, you can enable or disable Music Player, as well as toggle Automatically pause playback when other media start playing and set a timer for resuming playback.
Tab Emojis
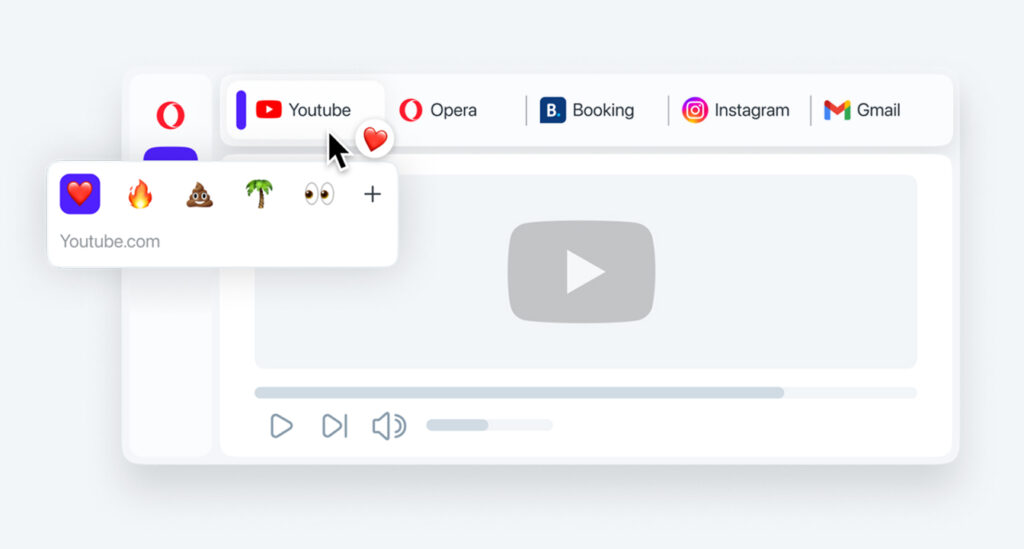
Opera’s Tab Emojis feature allows you to personalize your browsing experience by adding colorful emojis to your tabs. This fun addition helps you quickly identify your open tabs at a glance, making navigation more enjoyable and efficient.
To add an emoji to any tab, hover your mouse over the tab and select an emoji from the popup that appears. You can also click the + to see a longer list of emojis.
To remove the emoji, just hover over the tab again, and click the same emoji.
If you ever want to disable the Tab Emojis feature, go to Settings (Alt+P), navigate to the User interface section, and toggle off the option for Tab Emojis. This will revert your tabs back to their standard look. Settings > Features > User interface > Show emojis in tab tooltip
Split Screen
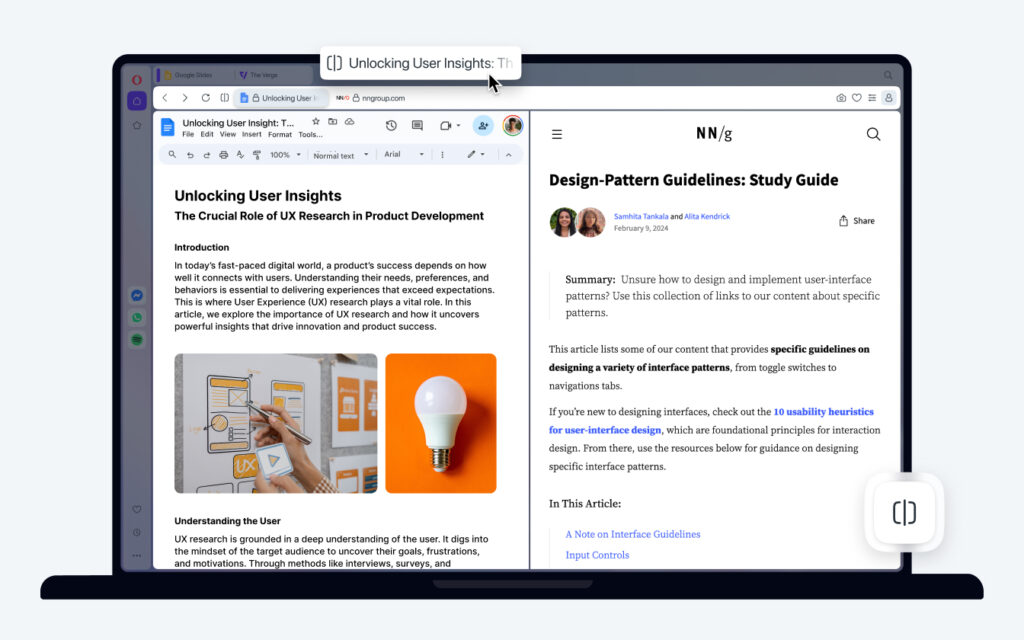
The Split Screen feature in Opera allows you to join two tabs side by side and use them simultaneously. This is especially useful for studying, working, comparing content, or keeping track of multiple sites without switching tabs.
How to use Split Screen in Opera
To split your screen between two tabs, click on a tab and drag it down on your screen. You’ll have the option to connect it to either side of your current tab. You can also shift-select two tabs and right-click, then choose Create Split Screen in the context menu.
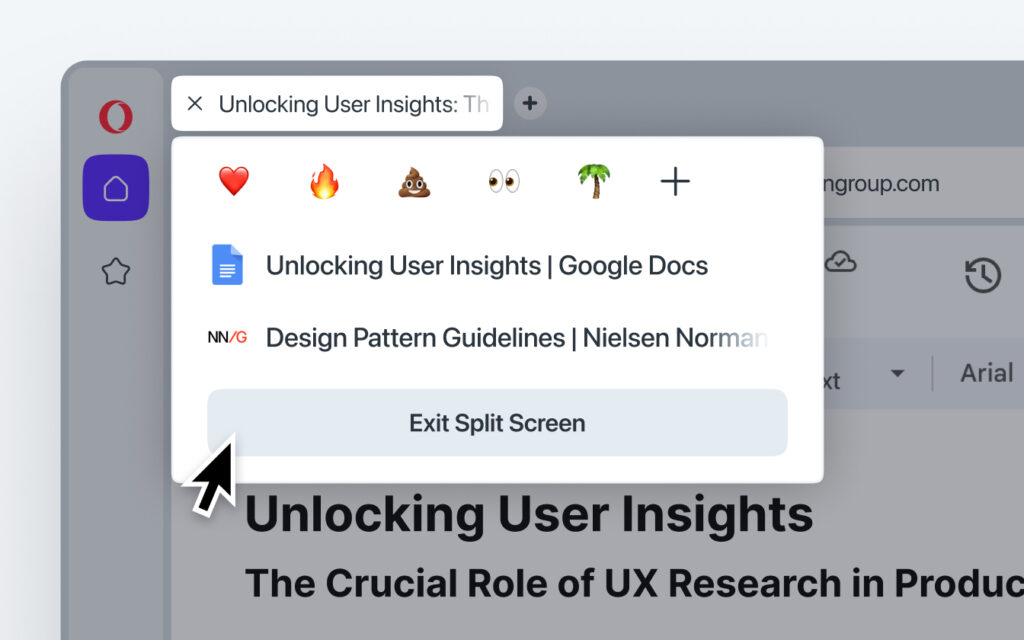
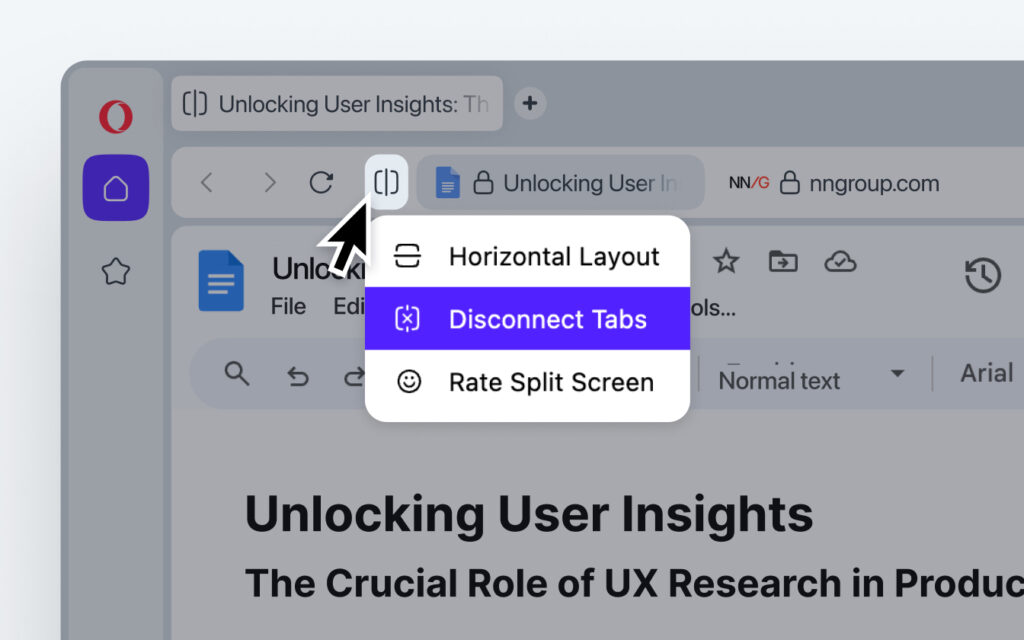
Joined tabs are visually connected in your tab strip. You can separate them in three different ways:
- Close one of the connected tabs in the address.
- Mouse over the connected tabs and select Exit Split Screen in the popout menu.
- Click the Split Screen icon on the left of the address bar and select Exit split screen. You can also use this menu to switch between horizontal and vertical layouts.
Split Screen and Tab Islands
Split Screen interacts with Tab Islands to help you organize your workspace:
- You can create several Split Screen groups within a single Tab Island.
- You can also move your Split Screen into a Tab Island.
- If you create a Split Screen using tabs from two different Tab Islands, the new Split Screen will be created outside of all tab islands.
- Similarly, if you create a Split Screen using a tab from an island and a regular tab (not in any island), the new Split Screen will appear as an independent group outside of any tab island.
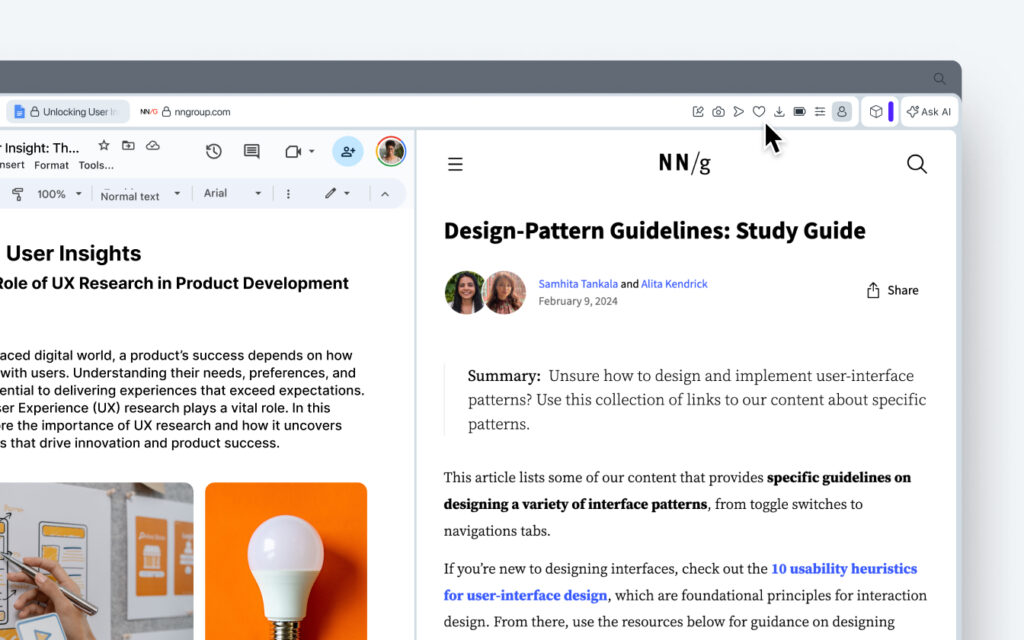
Toolbar in Split Screen
In the Split Screen mode, the toolbar remains visible and organizes icons based on how they function:
- Browser-wide icons are always displayed in the toolbar of the right tab. These include Account, Easy Setup, Download, Extensions, and the pinned Music Player.
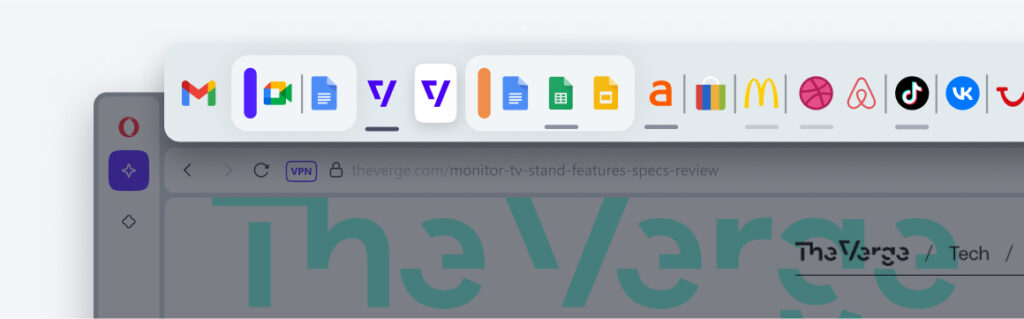
- Tab-specific icons appear when you hover over either the left or right tab, which is the same behavior as outside of Split Screen mode. These can include Pinboards, Snapshot, Privacy Protections, Flow, and Add to bookmarks.
Please note that the icons in the toolbar specific to a single tab can vary depending on the webpage you are currently on.
You can enable or disable the Split Screen feature in Settings (Alt+P):
Settings > Features > Split Screen > toggle on Enable split screen
Settings > Features > Split Screen > toggle on Enable split screen by drag and drop
Tab Traces
This simple, time-saving feature lets you identify recently used tabs at a glance. Your most recently used tabs have subtle highlights, so you can easily trace your steps – the brighter they are, the more recently you have used them.
Tab Traces activates automatically when you have more than eight tabs open. You can disable the feature in Settings (Alt+P).
You can also choose the number of open tabs that trigger Tab Traces activation.
Settings > Features > User interface > Show traces on most recently used tabs

Tab Islands
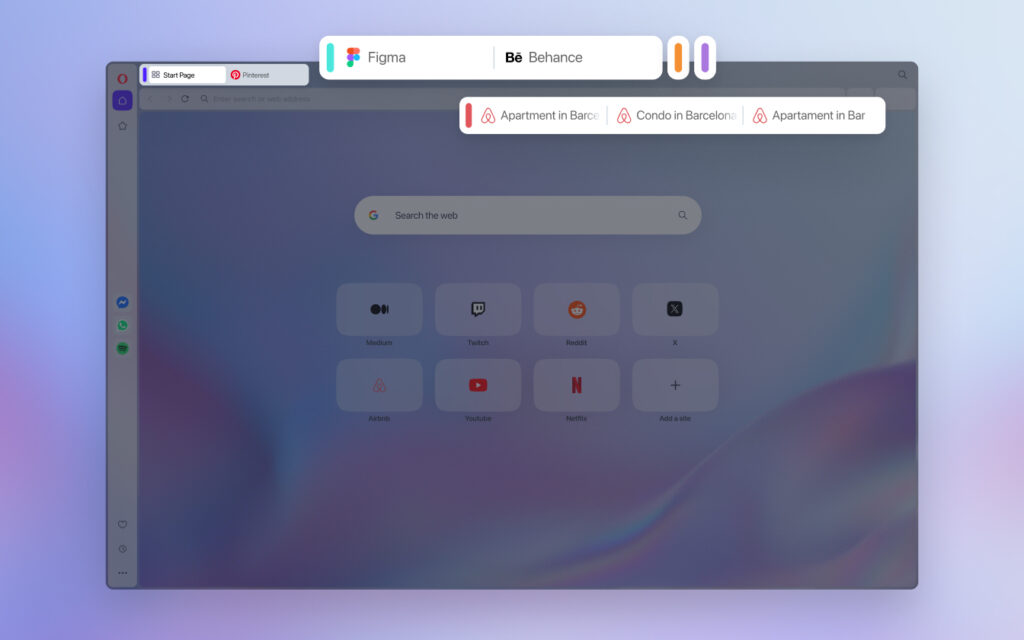
Tab Islands is a feature in Opera that allows you to organize your tabs into customizable groups. With Tab Islands, you can create distinct clusters of tabs, making it easier to manage your online tasks and workflows.
When you open a new tab, it automatically creates a new Tab Island at the top of the Opera browser. Each tab island has a colored handle. Click the colored handle to collapse or expand the tab group.
To preview the tabs within a Tab Island, simply hover over the colored handle. This displays a tooltip with a list of tabs and allows you to close them individually if needed.
To add a new tab to an existing Tab Island, right-click on a tab in that island and choose New tab in island in the context menu.
To create a new tab within the current Island, use the keyboard shortcut (Alt+T). This command not only opens a new tab, but also creates an Island if one doesn’t already exist. When you open new tabs in a new browsing session, a new tab island will be created automatically.
To move a tab from one group to another, right-click that tab and click Move to and then choose a tab island. You can also click Move out of tab island in the context menu, which will free the tab from its island so you can drag and drop it to any island you want.
To move multiple tabs at once, hold Shift and select all the tabs you want to move. Then right-click on one of the tabs to open the context menu. Choose Move out of tab island and drag them to any island you want.
To automatically create Tab Islands for new tabs, or to turn that function off, go to Settings (Alt+P):
Settings > Features > User interface > toggle on Automatically create tab islands
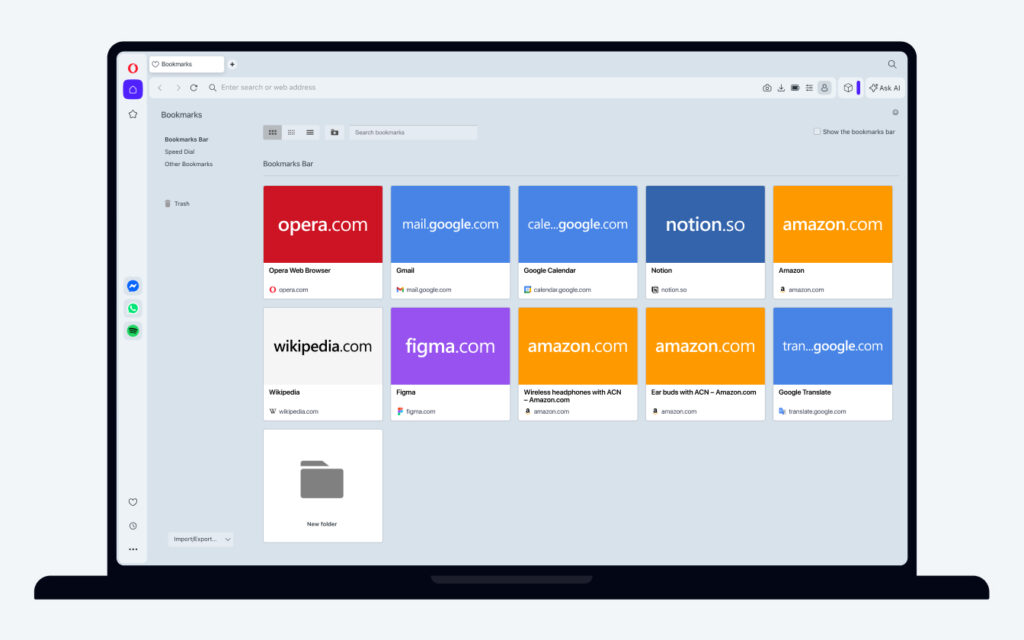
Bookmarks
Bookmarks are shortcuts you create for your favorite web pages. In Opera, your bookmarks are stored in the Bookmarks manager, where you can access, copy, delete, and edit the names or URLs of bookmarks.
There are three access points to the bookmarks manager in Opera:
- Sidebar – Click the
 icon in the sidebar.
 - Bookmarks bar – Right-click or ⌘ + click the bookmarks bar, then select Bookmarks.
- Opera Menu – Click the
 button in the top-left corner of the browser on Windows or Linux, then go to Bookmarks > Bookmarks. On Mac, click Bookmarks in the toolbar, then click Bookmarks.
Turn on the Bookmarks bar
To show the bookmarks bar under your combined address and search bar, go to Easy Setup ![]() in the top-right corner of your browser and click Show bookmarks bar, or go to your bookmarks manager and check the show the bookmarks bar box in the top-right corner.
in the top-right corner of your browser and click Show bookmarks bar, or go to your bookmarks manager and check the show the bookmarks bar box in the top-right corner.
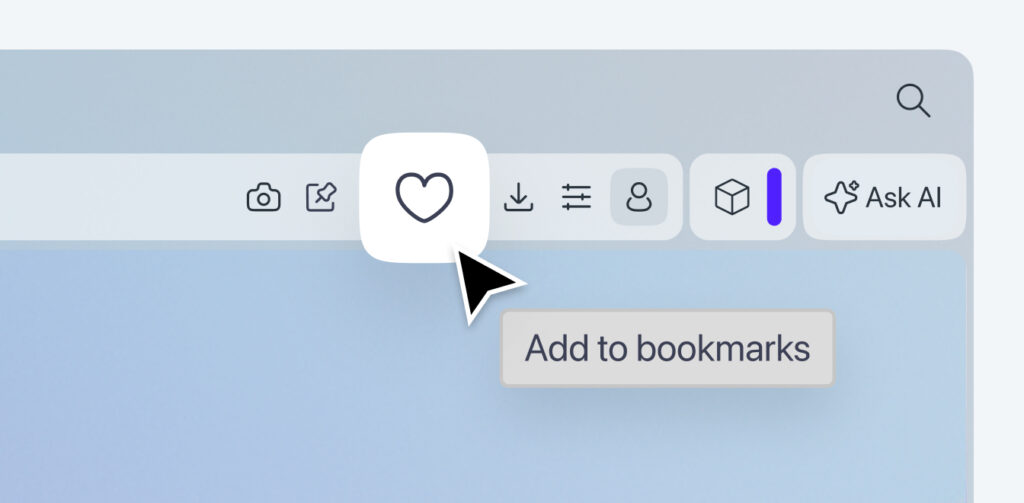
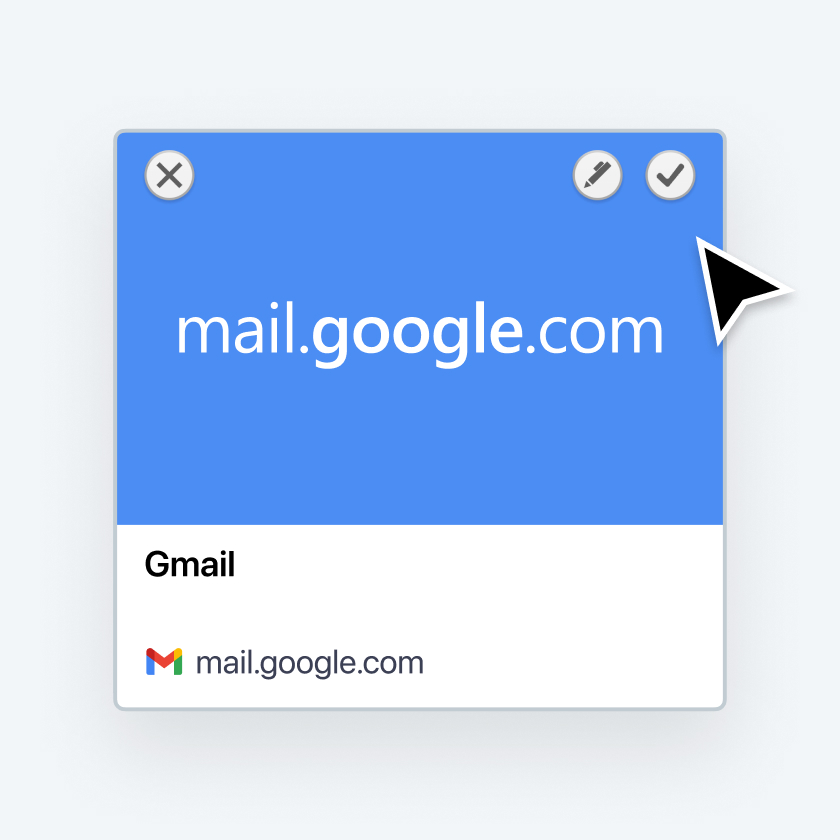
Create bookmarks
To create a bookmark, go to the webpage you want to bookmark and click the ![]() icon at the far-right end of the combined address and search bar. You will be prompted to name the bookmark and click done.
icon at the far-right end of the combined address and search bar. You will be prompted to name the bookmark and click done.
Edit bookmarks
To edit a bookmark in the bookmarks manager, hover your mouse over one and click the pen icon. You can now change the name and URL of the bookmark.
To copy a bookmark, right-click or ctrl + click the bookmark and click Copy in the pop-up window.
You can select multiple bookmarks by clicking the checkmark button on each bookmark. The checked bookmarks can be dragged as a group to a new location or copied to your clipboard. To delete a bookmark, click the x button.
Restore bookmarks
Deleted bookmarks are stored in ![]() Trash (Bin on Mac) in the left side panel. Open that page to see the bookmarks you have deleted. If you wish to restore a deleted bookmark to your bookmarks manager, hover your mouse over the bookmark and click Undo delete.
Trash (Bin on Mac) in the left side panel. Open that page to see the bookmarks you have deleted. If you wish to restore a deleted bookmark to your bookmarks manager, hover your mouse over the bookmark and click Undo delete.
Create a bookmarks folder
A bookmark folder holds multiple bookmarks in one place. These folders can be placed in the bookmarks bar or in your bookmarks manager. To create a bookmarks folder:
- Go to Bookmarks.
- Click the
 button.
 - Create a title for your new folder.
- Click the pen icon to create the folder.
You can now click and drag bookmarks into your new folder.
You can also click and drag any folder to a different location on the left sidebar. To nest folders, drag one on top of the other.
To edit, delete, or select a bookmark folder, hover your mouse over a folder to reveal the edit, delete, and select icons.
You can select and manage multiple folders by clicking the checkmark icon on each folder. The icon will turn blue when actively selected. Multiple folders can be dragged and placed in a new location.
Similar to individual bookmarks, bookmark folders can be moved or copied to your Speed Dial. They will become Speed Dial folders on your start page.
Search and filter bookmarks
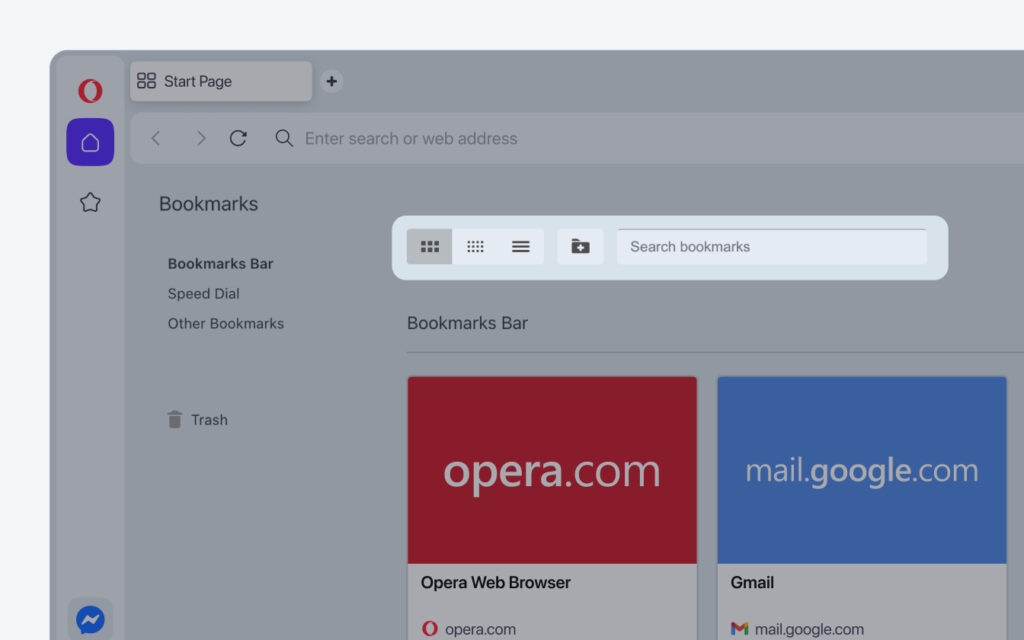
Use the bar at the top to search for bookmarks by name. Opera will filter bookmarks with each keystroke, looking in every folder, to help you find your page.
The switch on the left side of the search box changes how bookmarks are displayed. Select between a grid of images or a condensed list to better navigate your bookmarks.
Import or export bookmarks from other web browsers
You can import bookmarks from other web browsers to your Opera browser, as well as export bookmarks as an HTML text file from your bookmarks manager. To do so:
- Go to Bookmarks.
- Click the import/export button on the bottom of the left side panel.
- If you choose import, you will be brought to settings, where you can import bookmarks, as well as browsing history, saved passwords and cookies.
- If you choose export, a window will open for you to select the save destination for your HTML text file.

Sync
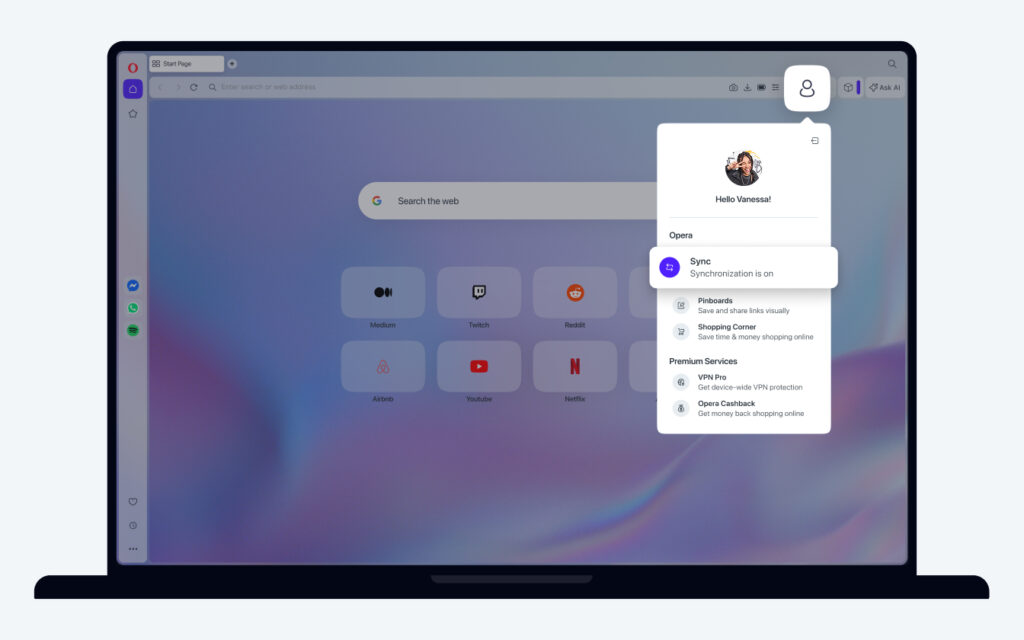
Creating and using an Opera account with our browsers helps sync tabs, bookmarks, passwords, and history across all devices. When you’re signed in successfully, the button will display a green checkmark. This checkmark indicates that Opera is syncing your browsing data to your account.
If you don’t have an Opera account, go to Settings > Synchronization and click Sign in. Then click the Create my Account! button to register.
To sign out of the sync service, click the account button and select Sign out. Once you sign out, any data that is saved to your device’s browser will not be synced with your account. For example, if you add a new bookmark, it will not sync to your other devices until you sign back into your account. Note: Signing out of your account does not remove data from the browser. When you sign out, any data synced to the browser will remain on your device. Similarly, any data synced to your account will remain on Opera servers.
View and manage synced data
Opera syncs your bookmarks, Speed Dial entries, browsing history, passwords, settings, and open tabs with your other Opera browsers through an Opera account. Sign into your Opera account on your home and work computer, your phone and your tablet, and you can pick up where you left off when you switch devices.
Once you sign in, the browser pushes all of your device’s browsing data into your Opera account. The same will happen when you sign in on a different computer, on your phone, or on your tablet.
Your bookmarks, Speed Dial entries, browsing history, passwords, and settings will be merged onto your Opera account and shared between the devices you sign in on. Read more about how Opera manages your Opera account.
To select which kind of browsing data Opera syncs between devices:
- Go to Settings.
- Under Synchronization, click Advanced sync settings.
- Select the data types you wish to sync.
View and manage synced bookmarks
To view bookmarks from your other devices, go to Bookmarks > Show All Bookmarks from the menu bar on Mac or the ![]() Menu on Windows and Linux.
Menu on Windows and Linux.
Opera merges each device’s bookmarks and bookmark folders. The sidebar of the bookmark manager updates automatically when you add new folders or bookmarks on different devices. Any changes you make to your bookmarks in the manager will be synced to your other devices. Read more about bookmarks.
View and manage synced Speed Dials
To view and manage Speed Dial entries from other devices, open the bookmark manager by selecting Bookmarks > Show All Bookmarks from the menu bar on Mac or the ![]() Menu on Windows and Linux.
Menu on Windows and Linux.
Opera organizes your device’s Speed Dial entries like bookmarks. To view, edit or remove Speed Dial entries on all your devices, click Other Speed Dials on the sidebar.
View and manage synced history
To view your combined browsing history, select History > Show All History (menu bar on Mac; ![]() Menu on Windows and Linux). You can also access your History page by clicking on the clock icon on the sidebar from the start page.
Menu on Windows and Linux). You can also access your History page by clicking on the clock icon on the sidebar from the start page.
Opera merges the history of each of your devices onto the history page. Clearing items from your history clears them from the history of all the devices that you are signed into. Read more about clearing private data.
View and manage synced passwords
By default, your passwords are encrypted using your Opera credentials. Only encrypted password information is stored on Opera’s server and delivered to your devices. Opera uses your account credentials to decrypt passwords when you sign into your account on your other devices. When Opera receives and decrypts synced passwords, they are stored in your computer’s Keychain.
If you do not wish to use your Opera credentials for encrypting passwords, you can assign a master passphrase for your account. When you assign a master passphrase, not only your passwords but all of your synced data will be encrypted. To assign a passphrase:
- Go to Settings.
- Under Synchronization, click Advanced sync settings.
- Under Encryption options, select Encrypt all synchronized data with your own sync passphrase.
- Enter your desired passphrase, confirm the phrase, and click Save.
Synced passwords can be removed from your Opera account through Opera’s password manager. To manage passwords individually:
- Go to Settings.
- Click Advanced on the left sidebar, and click Privacy and security.
- Under Autofill, click Passwords.
Note: Removing passwords from Opera’s password manager and your Opera account does not remove password data from your local machine. Any synced password data will remain on your device and must be managed through your operating system’s password storage.
View open tabs
To view open tabs from other devices, select the Tabs button from the sidebar on the start page. Read more about synced tabs.
Tab snoozing
Tab Snoozing is enabled by default. Tabs that are not actively used will be paused, so they don’t use your computer’s memory. To activate the tab, simply click it.
If you want to disable Tab Snoozing, go to Settings > User Interface.
Duplicate tabs highlighter
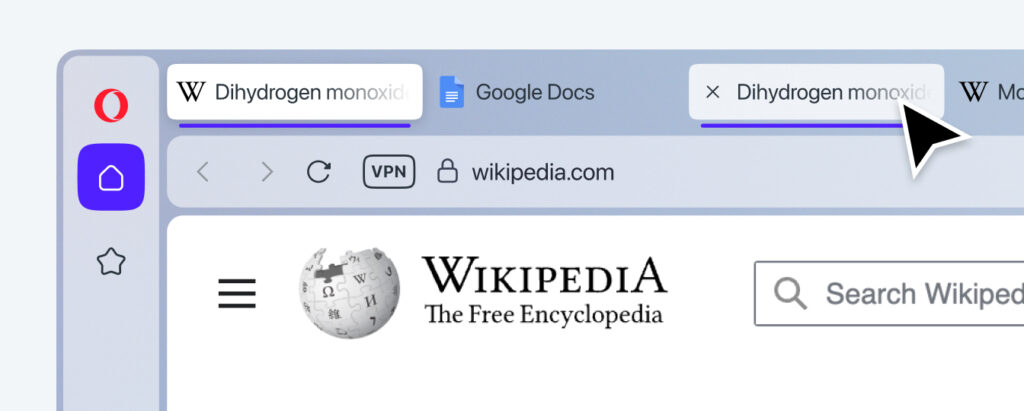
Especially if you work with many tabs open, they can sometimes get duplicated. Hover your mouse over one of the tabs, and the Opera browser will highlight the duplicate tabs. To close all duplicate tabs, right-click on one of the tabs and select Close duplicate tabs.
Pinboards

Pinboards work like virtual magnetic boards or sticky notes. You can write text, paste links, add images, and even link YouTube videos to share or save for later.
You can share your pinboards with friends, as well as browse any pinboards they send to you. Shared pinboards can be viewed from any device and no login is needed. A rich set of emojis allows you to leave reactions on any pinboard item.
To open Pinboards, select the icon from the left sidebar in the Opera Browser, or type opera://pinboards in the search bar.
To create a new pinboard, select the New pinboard button in the upper left corner. Fill it with whatever you want.
To share a pinboard, click the Share button in the upper right corner, and the link will automatically copy to your clipboard. Give the link to anyone you want, and they can access it from any browser.
Learn more at opera://pinboards.
Integrated messengers
Popular messengers can be found within Opera’s sidebar. With these integrated messengers, you can continue chatting with your family and friends in an easy-to-open panel as you browse different web pages. You will no longer need to continually track down and return to the tab with the messenger when responding to a message.
Facebook Messenger, WhatsApp, Instagram, Telegram, and VKontakte are integrated and available in Opera. After logging in with your appropriate account for the messenger, you will find all your contacts and current message threads ready. Having these messengers readily available works great when you want to quickly share a screenshot you’ve created with snapshot.
You can add or remove sidebar messengers from the Sidebar setup panel:
- Click the three-dot icon at the bottom of your sidebar.
- Under Messengers, check the messengers that you want to add or remove.
You can also manage your messengers in Settings:
- Go to Settings.
- Under Sidebar, click Manage Sidebar.
- Select which messengers you want available in the sidebar.
Here, you can also enable or disable notification badges for your messengers.
Logging into your messengers
- Click the WhatsApp icon in the sidebar. This opens a panel with a QR code and instructions.
- Open WhatsApp on your phone or tablet, go to your settings and select WhatsApp Web.
- Scan the QR code in the WhatsApp panel in Opera.
Facebook Messenger
- Click the Facebook Messenger icon in the sidebar, which opens the messenger’s panel.
- Enter your email or phone number, and the password you use for Messenger.
- Click Sign In.
Telegram
- Click the Telegram icon in the sidebar. A panel will open up and ask you to sign into your account.
- Make sure the correct country is selected, enter the phone number you use for your Telegram account, and click Next.
- You’ll be asked to make sure the number is correct. If it is, click OK.
- Telegram will send a text to your phone with a Login code. Enter that code in the Telegram panel in your browser.
VK (VKontakte)
- Click the VK icon in the sidebar.
- If you already have an account, enter your email or phone number, along with your password, and click Log in.
- If you don’t have an account, click Sign up for VK and follow the instructions, or log in with your Google or Facebook account.
- Click on the Instagram icon in the sidebar, which opens the Instagram panel.
- Enter your account information to log in with an existing account, or log in using Facebook.
- If you don’t have an account, click Sign up.
- Click on the Twitter icon in the sidebar, which opens the Twitter panel.
- Enter your phone number, email, or username, along with your password, and click Log in.
- If you don’t have an account, click Sign up for Twitter.
Muting, pinning, or logging out of your messengers
Each messenger can be opened by clicking on its icon, and then closed by clicking the icon again.
With one of your messengers open, you will find a ![]() menu in the top-left corner, and a pin icon in the right corner.
menu in the top-left corner, and a pin icon in the right corner.
Clicking the ![]() icon will open the options to mute the messenger of notifications, hide the panel, or log out.
icon will open the options to mute the messenger of notifications, hide the panel, or log out.
By clicking the pin icon in the top-right corner of the panel, the messenger will remain open as you browse the web. Click the icon again to unpin the messenger.
Personal News
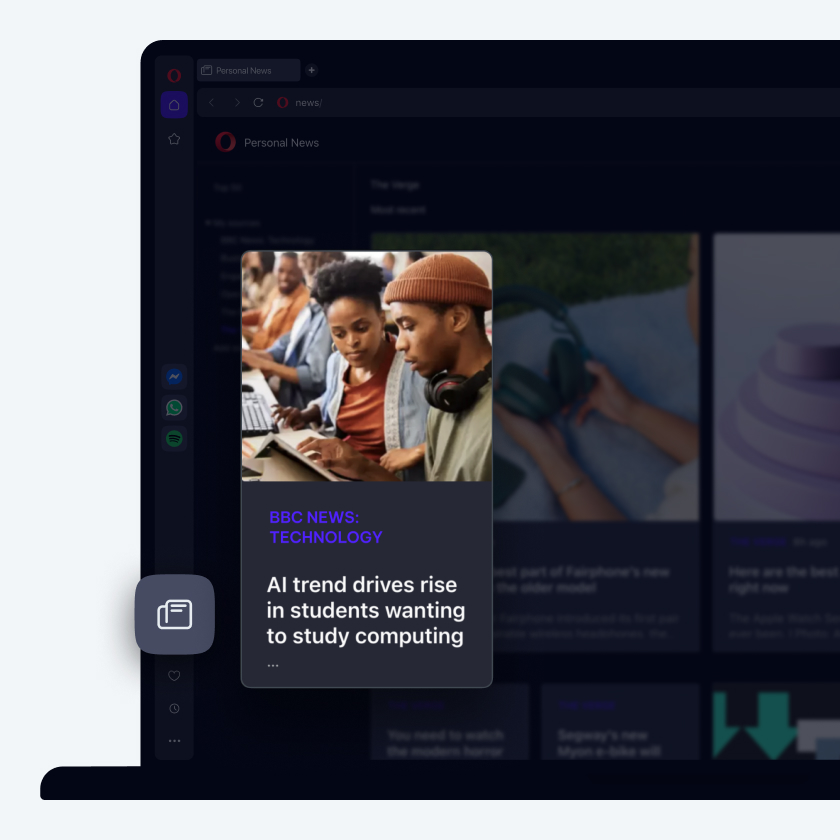
Personal news helps you discover new and trending topics. It is a collection of recommended web content from news to sports to arts, and more. Catch up on your region’s most-read news under Top 50.
Clicking on the newspaper icon in the left sidebar of the start page will take you to the personal news feed. When you find something interesting to read, click on the entry to open the full news article in a new tab.
Opera creates your news feed based on your location. The Top 50 is an aggregation of trending news topics based on region and language. To change and view other regional content:
- Go to Personal News > Top 50.
- From the dropdown menu, select a region/language.
- The news feed will refresh with the latest content.
Create your own list of sources
You can customize the news feed to show you articles from sources you frequent, or from a list of topics you are interested in. Under My Sources, you can find a list of recommended or cataloged topics. To add your own source to the news feed:
- Go to Personal News.
- From the left panel, select My sources.
- Click Add sources.
- Search for your source in the text field, or select from the recommended or topical sources below.
Set refresh intervals for your news feed
You can select when Opera’s news feed will refresh with new, trending content. You can select from a frequent 5 minutes, to a longer sixty minutes, or to never. By selecting never, the news feed will refresh only when you reboot the browser.
To change the refresh interval for your personal news feed:
- Go to Settings.
- Click Advanced in the left sidebar, and click Features.
- Under Personal news, select an interval from the Check my sources for new content dropdown menu.
Be notified of available news feed sources
You can be notified if a website you are visiting has an RSS feed available for your news feed. A blue newspaper icon will appear in your address bar.
To be notified of available news feed sources, click the Show available news feeds on address bar checkbox under Settings > Advanced> Features > Personal news.
News on start page
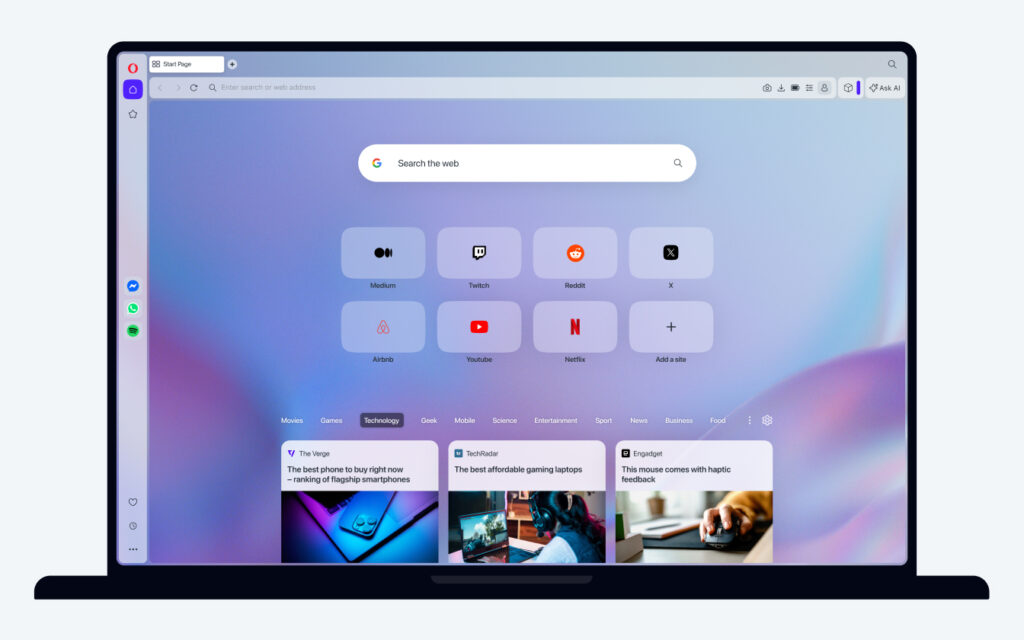
News on the start page provides the most popular news articles from the web according to the languages and regions of your choosing. Scrolling down below your Speed Dial folders will open news dials for you to read. Click on an article dial to open it in a new tab.
To turn on news on the start page:
- Go to Settings.
- Click Advanced in the left sidebar, and click Features.
- Under Personal news, turn on Show news on start page.
Multiple categories can be selected to filter the content you wish to appear on your the start page. While viewing the news on the start page, select All to receive news from all topics, or select individual topics for a personalized news feed.
You can choose multiple languages and regions in the cogwheel icon on the far-right side of the categories bar.
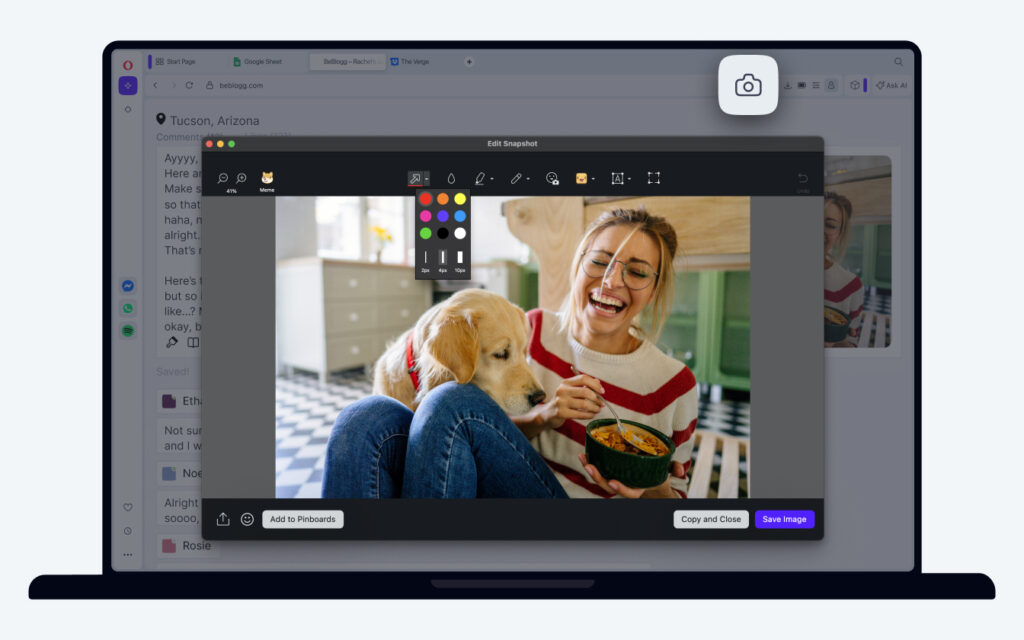
Snapshot
Opera’s snapshot tool is a built-in screenshot feature for your browser, allowing you to capture any part of a web page. Snapshot includes editor tools so you can customize, highlight, and have fun with the screenshots you capture.
To take a screenshot with snapshot:
- On a web page, press Shift + Ctrl + 5 (⇧ + ⌘ + 2 on macOS).
- Adjust the frame to crop the part of the web page you want to capture.
- Click Capture.
You can select Capture Full Screen to take a screenshot of the entire page currently visible on your screen, also known as the viewport, or select Save page as PDF to save the full page, from top to bottom, as a PDF.
Alternatively, you can initiate snapshot by clicking the camera icon on the right side of the toolbar.
Editing your screenshot
Opera’s snapshot feature includes these editing tools, from left to right:
- Zoom
- Arrow
- Blur
- Highlight
- Pencil
- Selfie camera
- Emojis
- Text
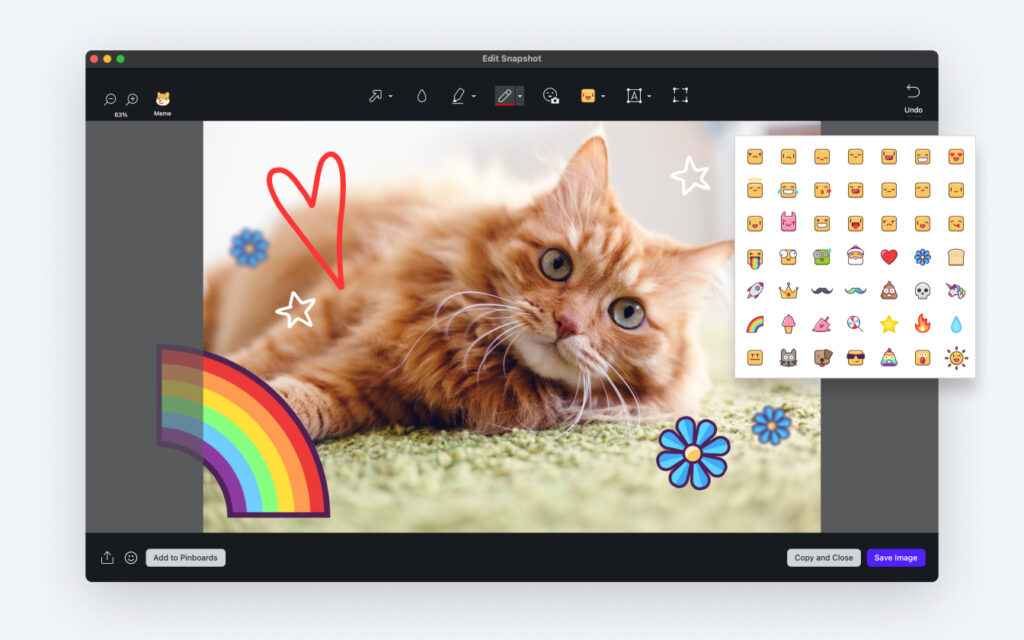
When you are finished editing the screenshot, you can choose to Copy and Close the image or to Save Image.
Clicking Copy and Close will copy the image to your clipboard, ideal for quickly pasting the image to a message in the integrated sidebar messengers.
If you wish to the save the image to your system, click Save Image. The image will be saved as a .png file in a location of your choosing.
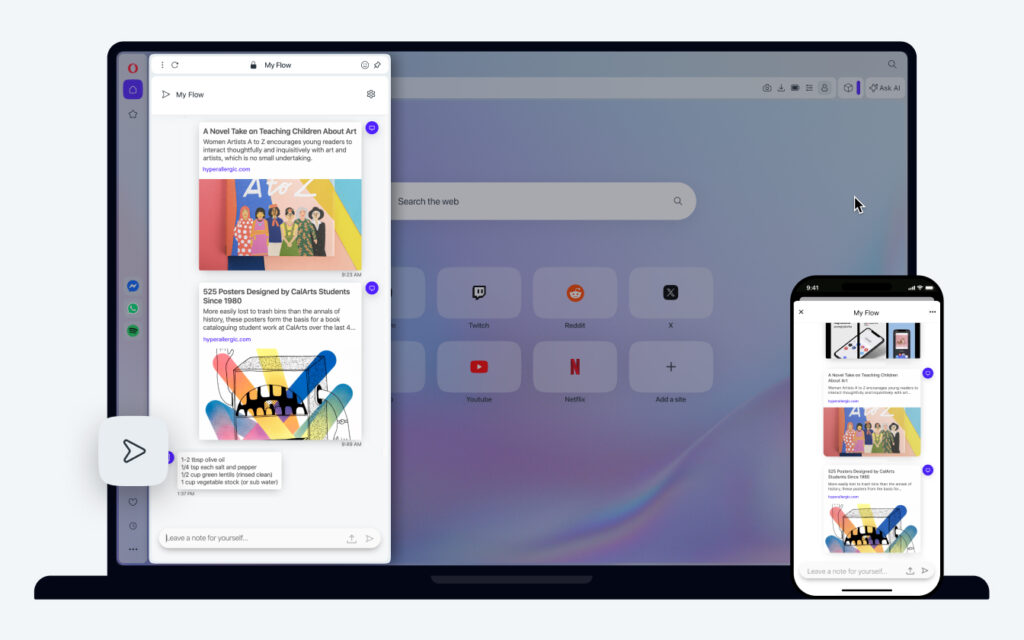
My Flow
My Flow is the encrypted space shared between your Opera browsers on desktop, Android and iOS, including Opera Browser, Opera GX and Opera Mini. With My Flow, you can send online content like links, YouTube videos, web images and personal notes, to access them at any time from your connected phone or computer. You can also share your own files, such as pictures and documents, between devices quickly and easily. In My Flow, your content is displayed to help you identify which connected device something was sent from. Content such as videos or audio files can be played within My Flow or opened as a new tab. It’s a great way to keep everything organized and accessible.
Enable My Flow
To use My Flow, you need both Opera for Desktop and either Opera Touch for iOS or Opera for Android. In your desktop browser:
- Go to the Easy setup menu
 and make sure My Flow is enabled.
 - Click the My Flow icon
 in the sidebar and reveal the QR code.
 - Scan the code with your Opera Touch or Opera for Android browser.
To scan the code with Opera Touch for iOS:
- Tap the My Flow icon on your start page or tap the three-dot menu
 and select My Flow.
 - Tap the Connect a Computer button and Scan QR Code.
To scan the code with Opera for Android:
- Tap the address and search bar on your start page.
- Tap the QR code icon on the right side of the bar.
Sending online content to My Flow
Send online content by tapping the ![]() button on the right end of your address bar.
button on the right end of your address bar.
Sending documents or pictures to My Flow
To share your own pictures, documents or other files, you can either drag and drop them into My Flow on your computer, or click the upload button and navigate to the file on your device. At the moment, My Flow can save and share files up to 10mb and files will disappear automatically after 48 hours.
Receiving content from other connected devices
A small notification badge appears in the menu bar in My Flow when new content is sent. New content appears in My Flow with information on the device which sent it and a timestamp of its arrival.
Interacting with content in My Flow
Links to web content, videos, and other media in My Flow can be opened in a new tab or interacted with directly there. You can also copy the page’s web address or a note to your device’s clipboard.
Open in a new tab
To open content from My Flow in a new tab, tap the preview image or the text preview.
Play media in My Flow
Media, such as a YouTube video, can be played in My Flow. Tap the embedded media file to play it.
Copy
All content in My Flow can be copied to your device’s clipboard. Tap and hold the item to reveal the pop-up button, then tap Copy.
Deleting content from My Flow
Links, videos, photos, or notes in My Flow can be deleted individually or entirely.
To delete an individual item from My Flow:
- Go to My Flow.
- Tap and hold the page preview image or the device icon next to the item you wish to delete.
- Tap Delete from the pop-up.
To delete all content from My Flow:
- Go to Settings.
- Under Connection, tap Clear My Flow.
If new content sent to My Flow does not appear in the panel, you may need to refresh or reset My Flow. To refresh My Flow, click the![]() button at the top of the panel.
button at the top of the panel.
If refreshing fails, you may need to perform an Emergency Reset. Click the ![]() menu and click Emergency Reset.
menu and click Emergency Reset.
After the emergency reset, you will need to re-connect My Flow with Opera Touch.
Deleting all user/account data from My Flow
To delete your account and all data associated with it:
- Go to Settings
- Under My Flow, click on Manage devices
- Click on Disconnect all devices
- Confirm by clicking DELETE
All content will be deleted and the connection between phones and computers will be removed.
Search Tabs
The Search Tabs tool is an easy way to find a specific open tab when you have a lot of them in one window. Press Ctrl+Space to bring up the tool, and start typing a keyword to identify the tab. The list will update and narrow down your options as you type.
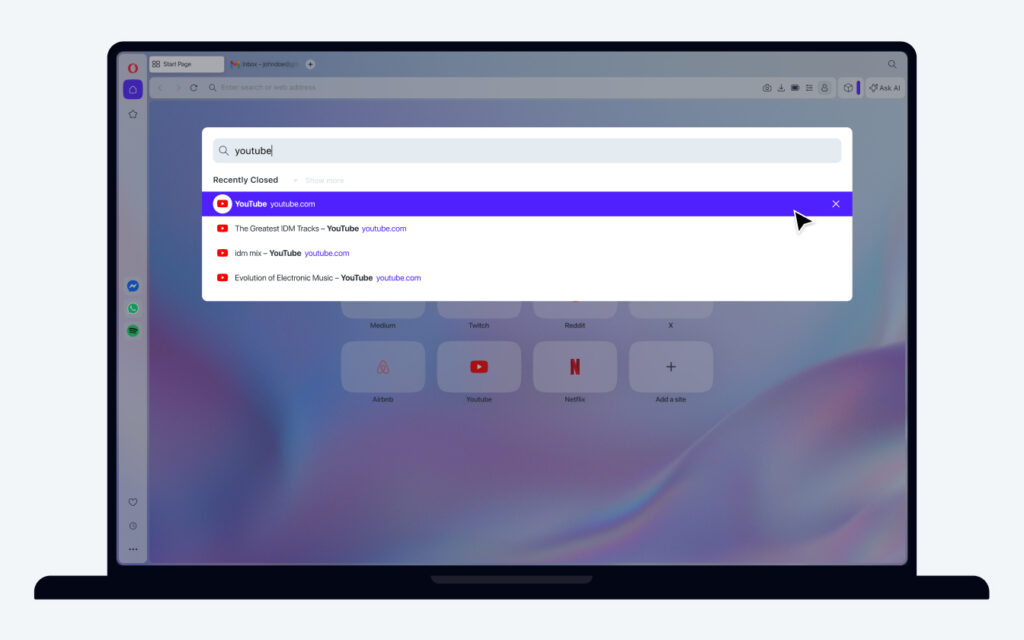
You can also open Search Tabs by clicking on the magnifying glass icon to the right of your tabs. This icon replaces the previous Tab menu.
Recently closed tabs
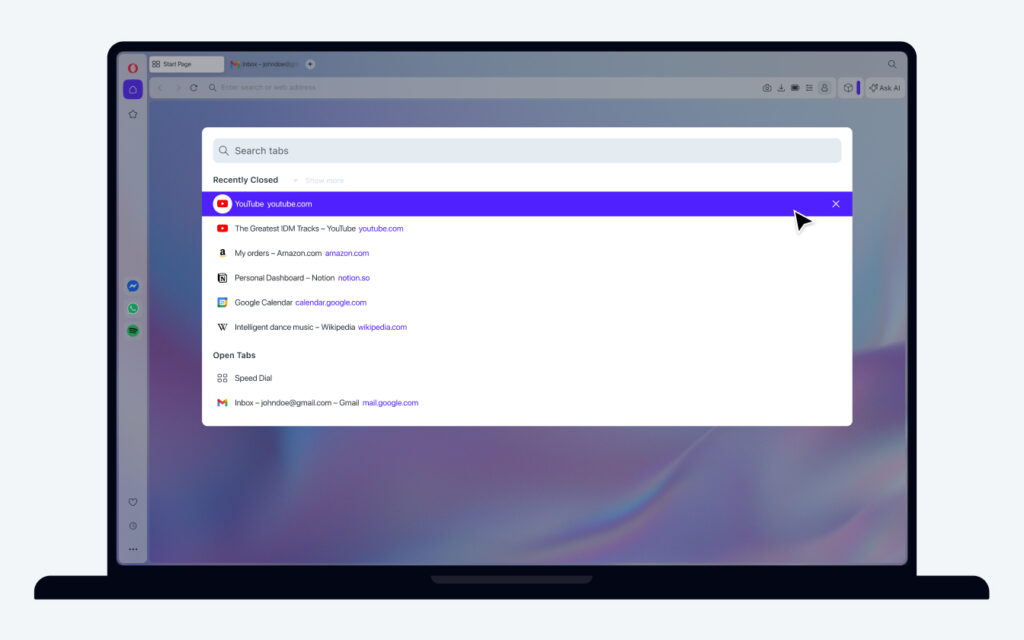
You can also view recently closed tabs by pressing Ctrl + Space or clicking the magnifying glass icon to the right of your tabs. To resurrect a closed tab, simply left-click on it.
Easy Files
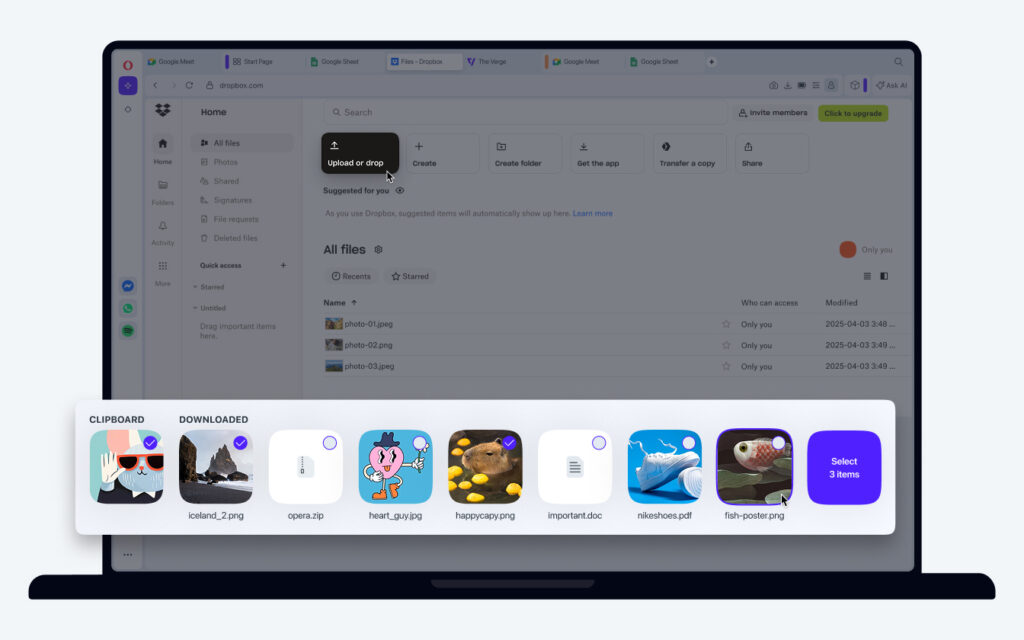
Easy Files makes it easier to attach and upload files from your computer. When you go to attach a file, the Easy Files module appears showing your most recently downloaded files, images you have recently used, and your clipboard files.
To add a file, select it from the Easy File gallery with a click. You can also select multiple files to upload at once – you can turn that option on in Settings (Alt+P).
To enable or disable Easy Files, go to:
Settings > Features > Easy Files

Workspaces
Workspaces give you the opportunity to manage tabs for pages related to various topics, e.g. work, planning holidays, shopping. You can keep tabs related to your chosen topic in one workspace and not be distracted by tabs related to another one. Think of workspaces as pockets for tabs – you can keep them empty, or you can fill them.
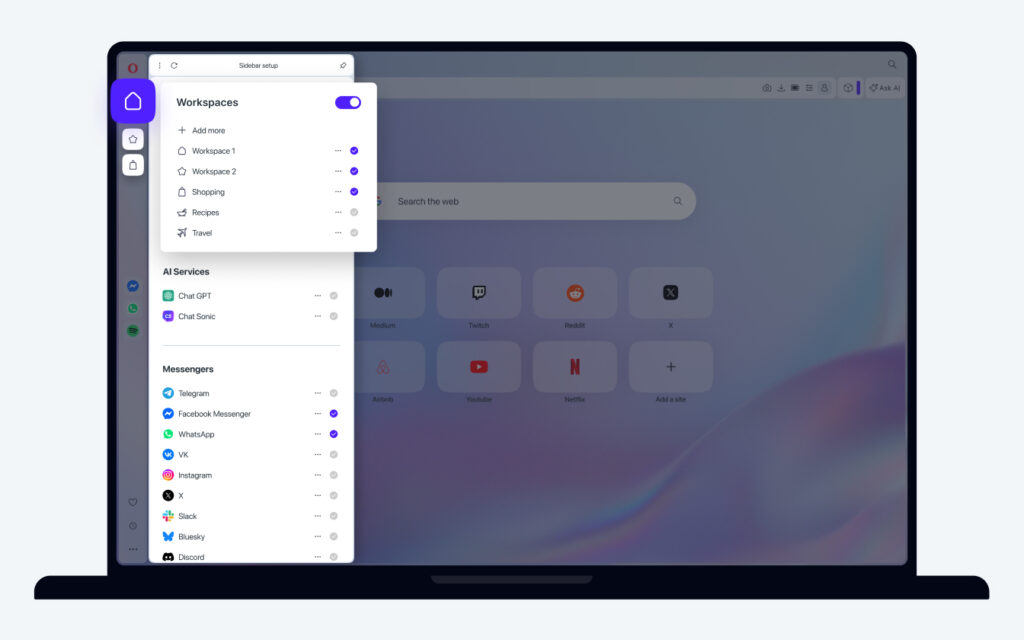
Your workspaces can be accessed through the workspace icons at the top of your sidebar. Click on the icons to jump between them. To manage your workspaces, click the three-dot menu at the bottom of your sidebar to open the sidebar setup panel. There you can:
- Turn workspaces on/off
- Click the toggle-switch
- Add more workspaces (up to 5 currently)
- Click Add more next to the + icon
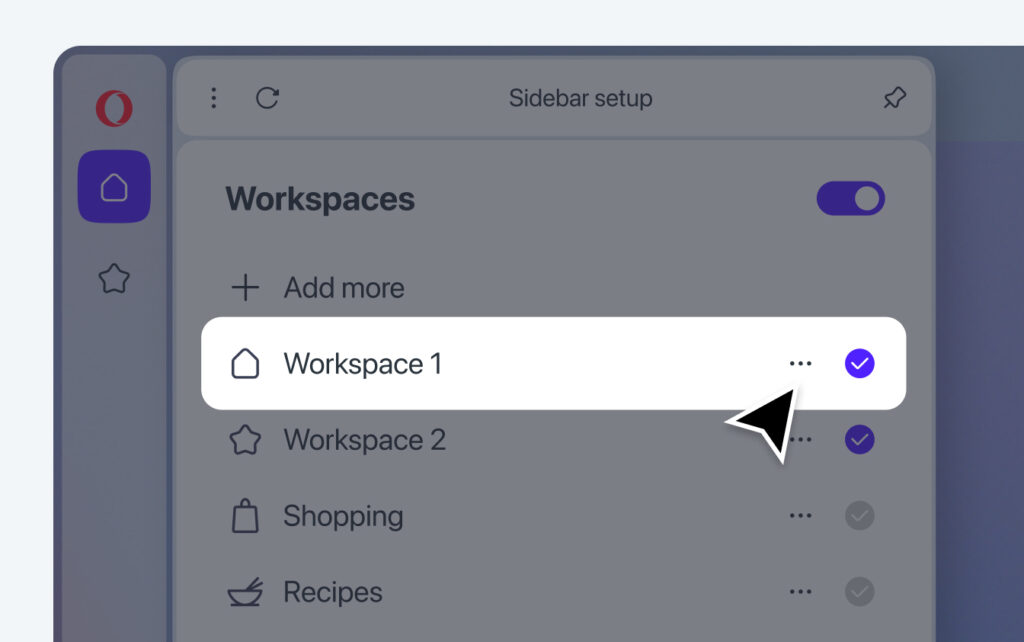
- Edit the workspace icon or name
- Click the three-dot icon next to a workspace
- Select Edit
- Remove a workspace
- Click the three-dot icon next to a workspace
- Select Remove
- Hide a workspace (not the active workspace)
- Click on a blue check-mark to hide that workspace
- Click it again to make it visible
Move a tab to another workspace (this also works if you Shift-click multiple tabs).
- Right-click on a tab to open the Tab Context Menu.
- Select Move tab to workspace…
- Select the destination workspace.
Other Tab Context Menu items affect the current workspace only. For example, if you select Reload all tabs, only the tabs your current workspace will be reloaded. Equally, if you want to cycle through your tabs (Ctrl+Tab), you will cycle through tabs in your current workspace.
If you want to open a link in a specific workspace, right-click the link, hover Open link in workspace, and select the workspace in which you want to open it.
Opera Translate
Opera’s built-in Translate feature allows you to instantly read web pages from around the world in your preferred language. Powered by secure, AI-driven technology from Lingvanex, it provides accurate translations without needing any extra extensions. To ensure open access to information, these AI translations are not restricted by censorship. Since all processing is handled on Opera’s servers, your browsing activity remains private.
Whenever you land on a webpage in a language different from your browser’s default, Opera automatically detects it. A globe icon will appear on the right side of the address bar, indicating that Opera Translate is active and translations are available.
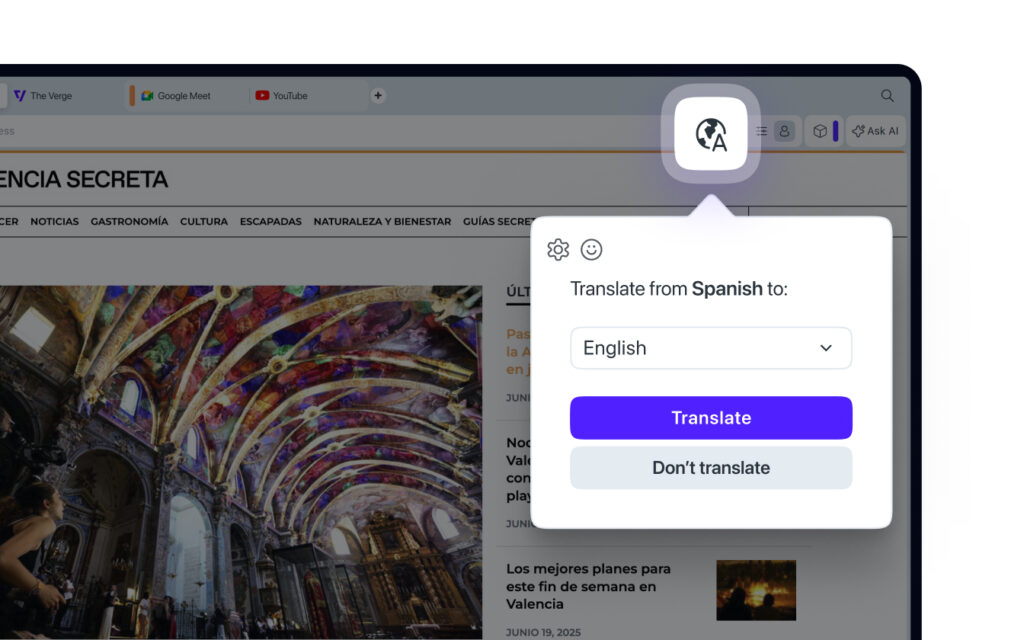
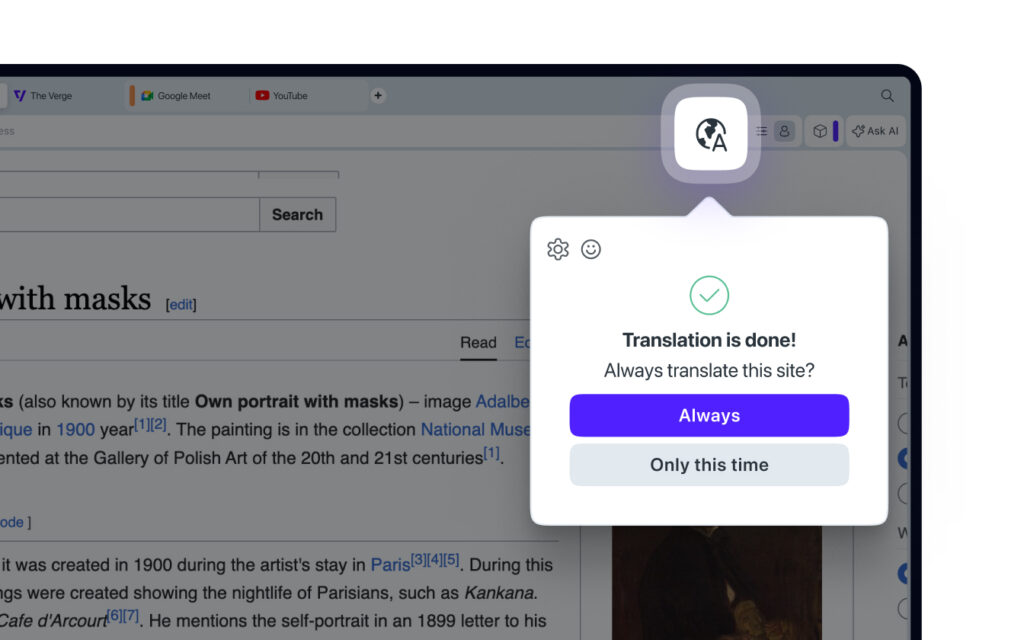
Click the globe icon to open a popup where you can have the page instantly translated into your preferred language. In this popup, you can also choose to automatically translate this page in the future, or tell Opera Translate to never translate this specific site or language again.
For more control, you can manage all your translation preferences in Opera’s Settings.
To access Opera Translate:
- Go to Settings (Alt+P).
- Click Features.
- Scroll down to the Opera Translate section.
Here, you have several options to customize your translations:
- Use Opera Translate – Turn the entire feature on or off with this switch. Translated pages can always be reverted to the original language.
Translate into this language – Select your preferred language from the dropdown menu. This will be the default language all pages are translated into.
- Automatically translate these languages – Add languages that you always want to translate without being asked.
- Never offer to translate these languages – Add any languages you already understand to prevent the translation popup from appearing on those pages.

Supported Languages
Opera Translate supports a wide variety of languages, including:
Arabic
Belarusian
Bengali
Bulgarian
Catalan
Chinese (Simplified)
Chinese (Traditional)
Croatian
Czech
Danish
Dutch
English
Finnish
French
German
Greek
Hebrew
Hindi
Hungarian
Indonesian
Italian
Japanese
Korean
Latvian
Lithuanian
Malay
Norwegian
Persian
Polish
Portuguese
Portuguese (Brazil)
Romanian
Russian
Sindhi
Slovak
Slovenian
Spanish
Swedish
Tamil
Thai
Turkish
Ukrainian
Urdu
Vietnamese
Continue On your start page
After you visit a supported site, such as Amazon, Booking, Airbnb, Walmart, or Otto, and view at least three hotels or products, Opera adds a Continue On section to your start page. This section brings together your most recent and frequently viewed items from supported sites in one place.
If you have the Capital One Shopping extension installed, you may see a personalized version of Continue On, with relevant rewards, promo codes, and deals displayed alongside your recently viewed items.
Opera doesn’t send your browsing history from these sites to its servers. Continue On works entirely within your browser and does not require any network requests. The section appears only after you’ve viewed at least three different items on supported sites.
To hide the section temporarily, click the arrow icon to collapse it, or open the three-dot menu and select Remind me later.To remove it permanently, open the three-dot menu and select Do not show again.
Better Address Bar Experience (BABE)
Note – This feature is currently being tested and is only available to some users.

The BABE feature (Better Address Bar Experience) is a helpful pop-out that appears when you click on your address bar. It provides quick access to:
- Sites you frequently visit
- Top Speed Dials
- Recommendations
- Newly-added bookmarks
- Useful browser locations
To enable or disable this feature:
- Go to Settings
- In the left sidebar, click Advanced then click Features
- Scroll down to the Enhanced address bar section
- Click Show enhanced address bar
To remove an item:
- Hover your mouse over an item and click the three-dot icon (…)
- Click Discard
You can change the size of the Speed Dials displayed in this feature by clicking the layout icons in the top-right of the pop-out. To close the pop-out, click the X followed by Hide enhanced address bar.
This feature gives you shortcuts and recommendations based on your browsing habits, so if you’ve just started using Opera, it may take some time for the feature to display. Just go about your browsing and it will show up soon.